Table of Contents
Your dry goods live in three different places right now. Some are in the cabinet above the fridge, some are in a box on top of the microwave, and the crackers are somewhere in the cabinet with the pots, wedged behind a baking sheet you haven’t used since last winter. None of that is disorganization exactly. It’s just what happens when a kitchen was built with zero dedicated pantry space and nobody ever assigned dry goods a real home.
You can build genuine pantry function without a pantry closet by picking one consistent zone (a single deep cabinet, the back of a pantry-less kitchen door, or a nearby shelf), decanting everything into matching clear containers, and labeling the front of each one. The location matters less than the consistency. What makes a pantry work isn’t the room. It’s the system inside it.
Pick One Zone and Commit to It
The most common mistake in a no-pantry kitchen is letting dry goods spread across three or four spots because no single cabinet felt big enough. Splitting your pantry items across multiple locations means you’re checking three places before you know whether you’re out of pasta, which defeats the entire point of organizing it in the first place.
Choose the single deepest, tallest cabinet you have, even if it currently holds something else. Depth and height matter more than square footage here: a narrow but deep cabinet holds more canisters than a wide, shallow one, and you can stack upward using risers far easier than you can expand sideways.
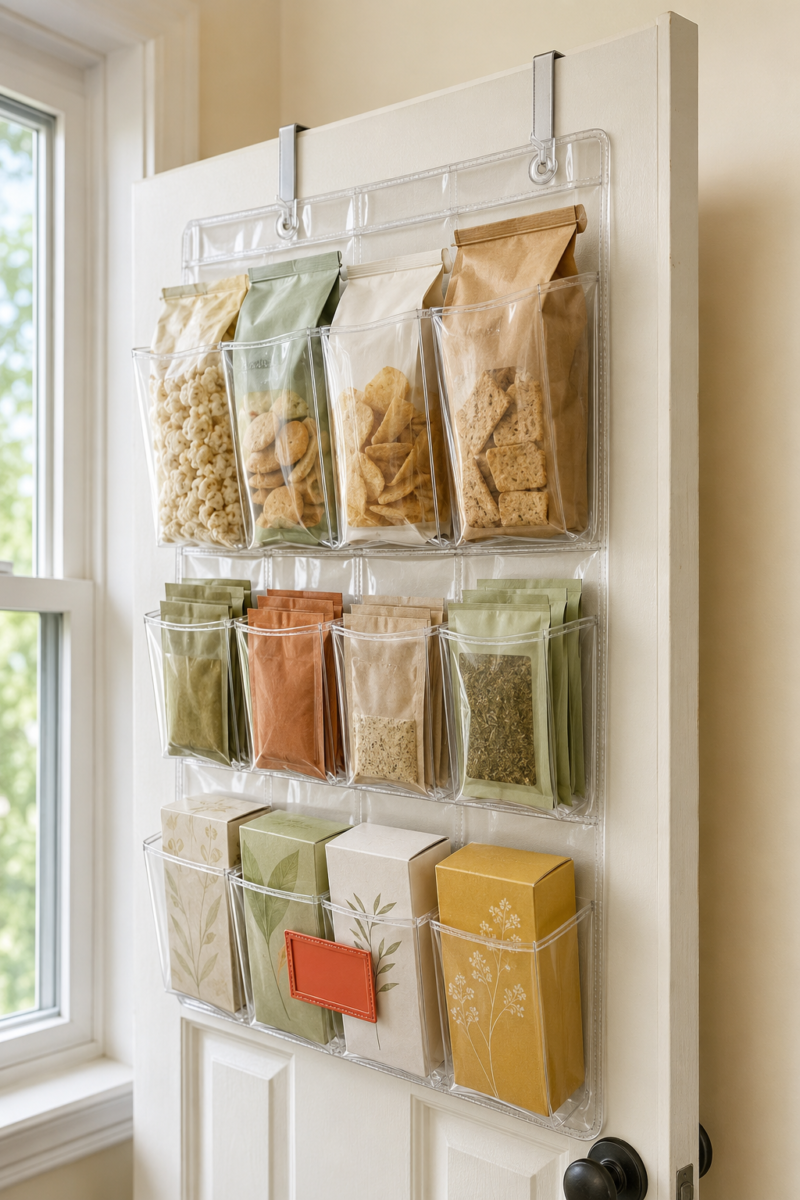
If no cabinet is deep enough, a door-mounted organizer on the inside of a nearby door (the pantry-less kitchen’s actual best friend) adds real storage using a wall you already have. Over-the-door units with clear pockets work well for spice packets, snack bags, and smaller boxed items that don’t need a full jar.
A narrow bookshelf or bar cart placed against any open wall near the kitchen works too, as long as it’s within a few steps of where you cook. Distance matters: a pantry system three rooms away gets used less than one an arm’s reach from the stove.
Decant Everything Into Matching Containers
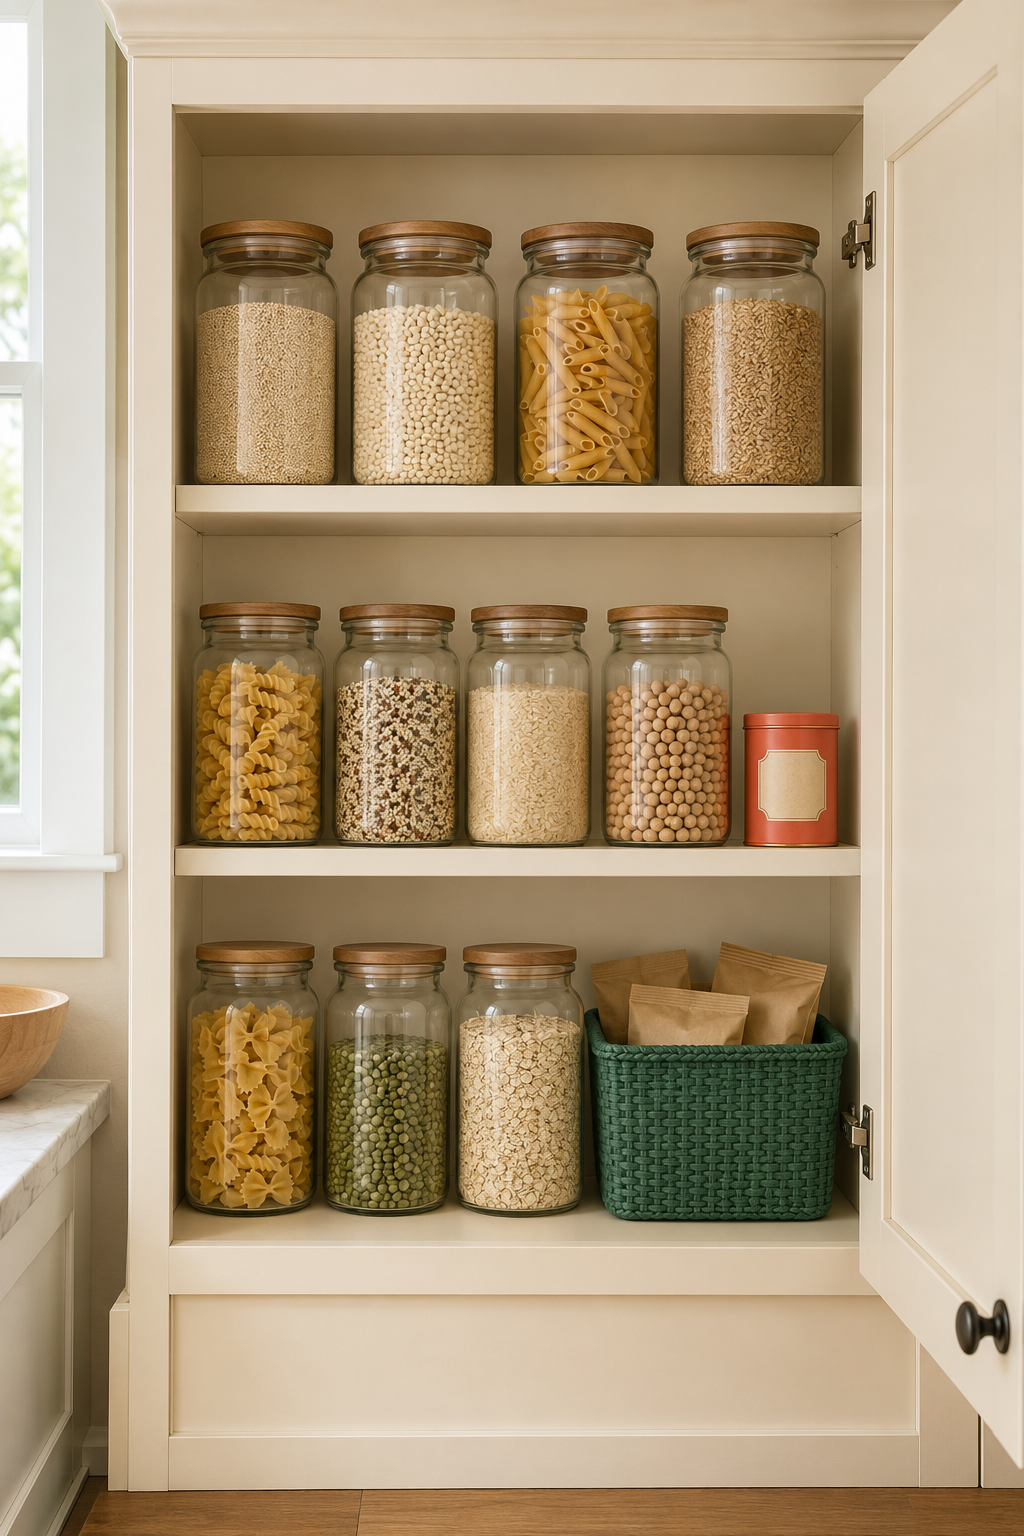
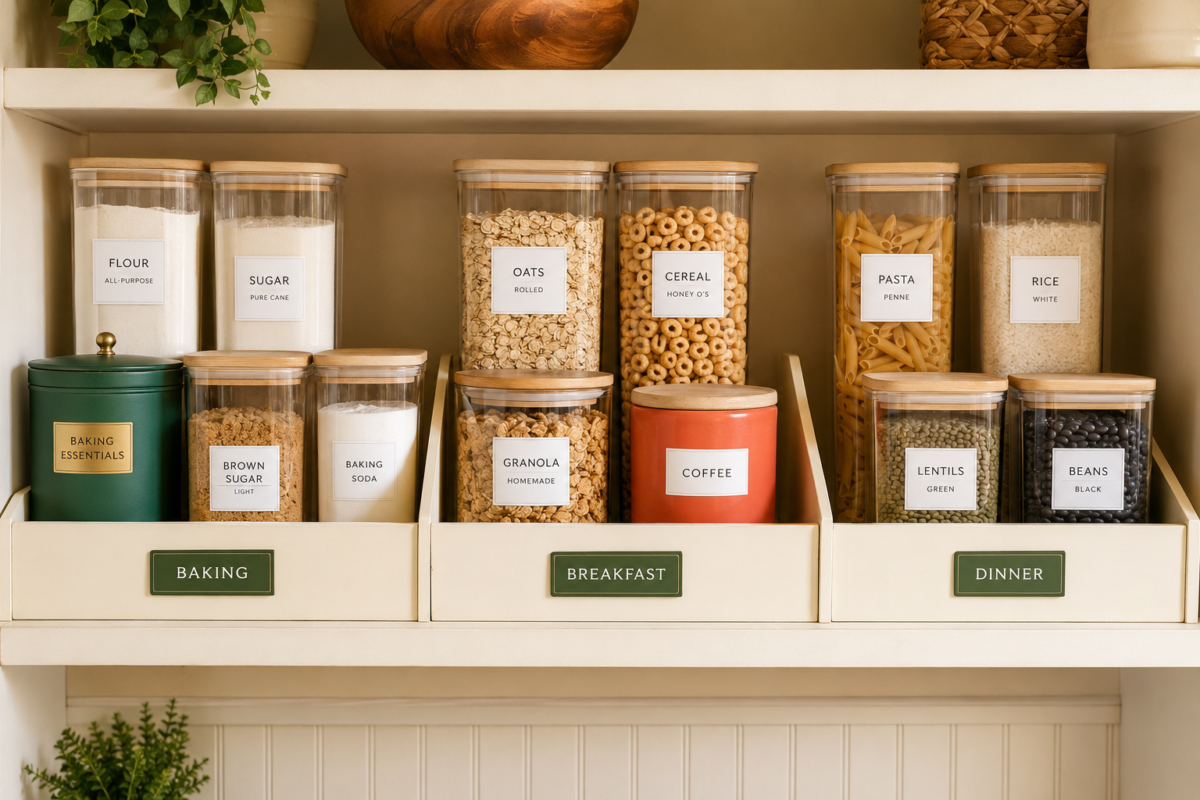
Move dry goods out of their original bags and boxes and into clear, airtight containers the moment you bring them home. This single habit does more for a no-pantry kitchen than any shelf or bin, because it standardizes shape (square and round containers stack and nest far better than a mismatched pile of bags), extends freshness, and makes your entire inventory visible at a glance.
Standard sizing that works for most small kitchens: a 4-cup container for rice and pasta, a 6-cup container for flour and sugar, and a set of smaller 2-cup jars for snacks, oats, or coffee. Buying one consistent size family, rather than whatever container happened to be on sale, is what makes stacking and shelf planning actually work.
Glass costs more but shows contents clearly and doesn’t stain or scratch the way some plastic does over a year of daily use. BPA-free plastic bins cost less and weigh less, which matters if your storage zone is above eye level or on a higher shelf you’re lifting containers down from regularly. Either works. Pick based on where the container is going, not just preference.
Label the Front, Not the Lid
Every container needs a label on the front face, at the height you’ll actually be reading it from while cooking. Lid labels only work if you’re looking straight down into an open container, which almost never happens once containers are shelved and stacked.
A simple label maker or chalkboard-style label sticker works fine. What matters is consistency: same font, same placement, same size across every container, so your pantry zone reads as one organized system rather than a mismatched collection of whatever label happened to be handy that day.
Include the item name at minimum. Adding an expiration or “restock by” date on a small secondary sticker is optional but genuinely useful for items you don’t use often, like specialty flours or grains that sit for months between recipes.
Group by How You Actually Cook, Not by Food Category
Arrange your zone by use case rather than strict food type. Baking items (flour, sugar, baking powder, chocolate chips) together in one section, breakfast items (oats, cereal, coffee) together in another, and dinner staples (rice, pasta, canned goods) in a third makes far more sense day to day than grouping everything alphabetically or by broad category.
This matters even more in a small, single-zone pantry than it would in a full walk-in, because you don’t have room for a dozen small sub-sections. Three or four clear use-based groups keep the whole zone scannable in under five seconds, which is the real test of whether a pantry system works.
If your kitchen’s storage challenges go beyond just dry goods, meaning cabinets, counters, and daily upkeep all need the same kind of system, The Complete Guide to Organizing a Small Kitchen walks through the full sequence from clear-out to daily habits.
Keep a Standing “Restock” List Where You’ll See It
A small notepad or dry-erase strip mounted just inside your pantry zone, or a running note on your phone, catches items the moment they run low instead of you discovering the gap mid-recipe. Write the item down the moment a container hits its last quarter, not after it’s fully empty.
This habit prevents the classic no-pantry problem: buying a third half-used bag of something because you couldn’t tell at a glance what you already had. Once your containers are clear and labeled, a quick glance tells you exactly what’s low, and the list just captures that glance before you forget it by the time you’re at the store.
If counter clutter is a related problem in your kitchen, meaning the items that don’t fit your pantry zone keep landing on your counters instead, Countertop Systems That Keep Clutter From Building Up covers exactly what should and shouldn’t earn permanent counter space.
Frequently Asked Questions
What’s the best cabinet to convert into a pantry if I don’t have one? The deepest, tallest cabinet available works best, even if it’s currently used for something else. Depth and height let you stack containers efficiently, which matters more than the cabinet’s overall width.
Do I need to buy matching containers for a no-pantry kitchen? Matching containers make a small pantry zone easier to scan and stack, but the real requirement is consistency in size and shape, not a specific brand. A mismatched set that stacks and labels well still works.
How much does it cost to set up a no-pantry system? A basic setup (a dozen mid-size containers, a label maker or label stickers, and a couple of bins) typically runs $40–$80 depending on container material. You can build it out gradually, starting with your most-used five or six items first.
Where should snacks go if I don’t have pantry space? Snacks work well in an over-the-door organizer or a dedicated bin within your main pantry zone, grouped separately from cooking staples so they’re easy to grab without digging past flour and rice.
Related Reading
- The Complete Guide to Organizing a Small Kitchen
- Countertop Systems That Keep Clutter From Building Up
- Daily Habits That Keep a Small Kitchen From Piling Up
- Kitchen Organization (parent category)
- Small Kitchens (parent hub)