Table of Contents
You open the closet door and something falls out. A scarf, maybe, or one shoe that’s been sitting loose on the floor for three weeks. You push the hangers to one side to find something specific, and they don’t move as a unit. They jam, because there’s no real order to them, just clothes crammed onto a rod that was never going to hold this much in the first place. You close the door before anyone else sees it.
A small closet gets disorganized fast because most closets, especially in rentals, come with exactly one rod and one shelf and nothing else. That’s not a storage system, it’s a single bar in a box, and it was never built for the amount of clothing, shoes, and off-season stuff a real person owns. Fixing it means treating the closet as four separate zones: the rod, the floor, the shelves, and the space above the door, each with its own job. Add slim hangers, a second rod, stackable bins, and one over-the-door rack, and a standard reach-in closet gains 30 to 40 percent more usable storage without a single hole drilled in the wall.
This guide walks through all four zones in order, plus how to keep the system from sliding back into chaos in week three.
The Rod: Maximize Vertical Hanging Space First
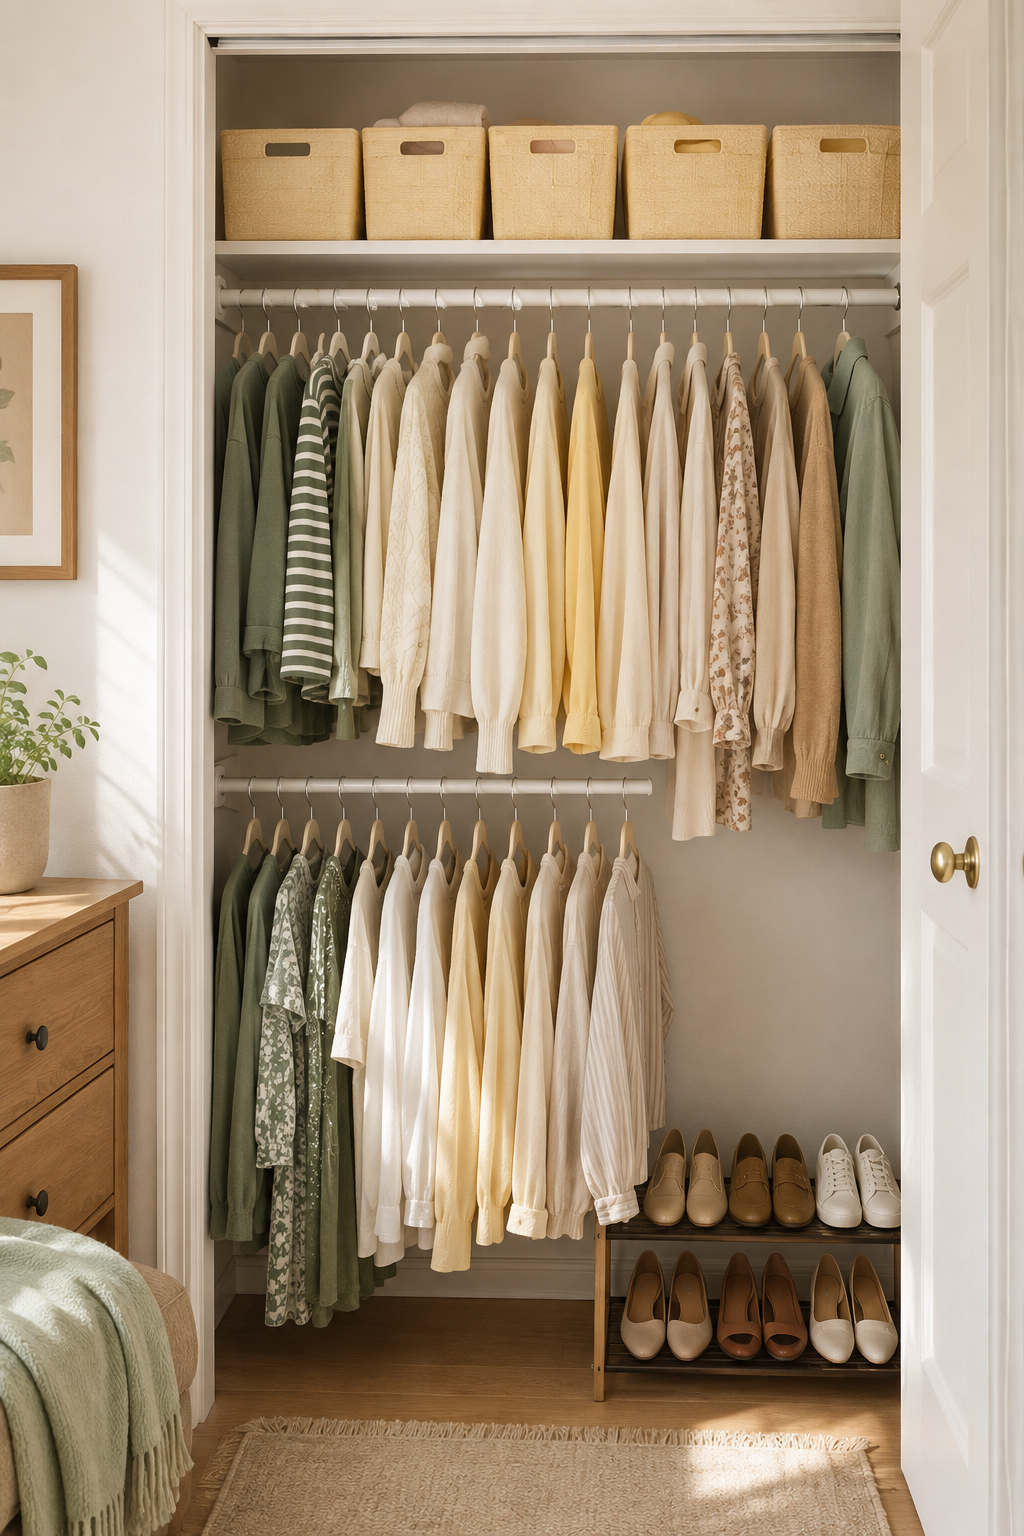
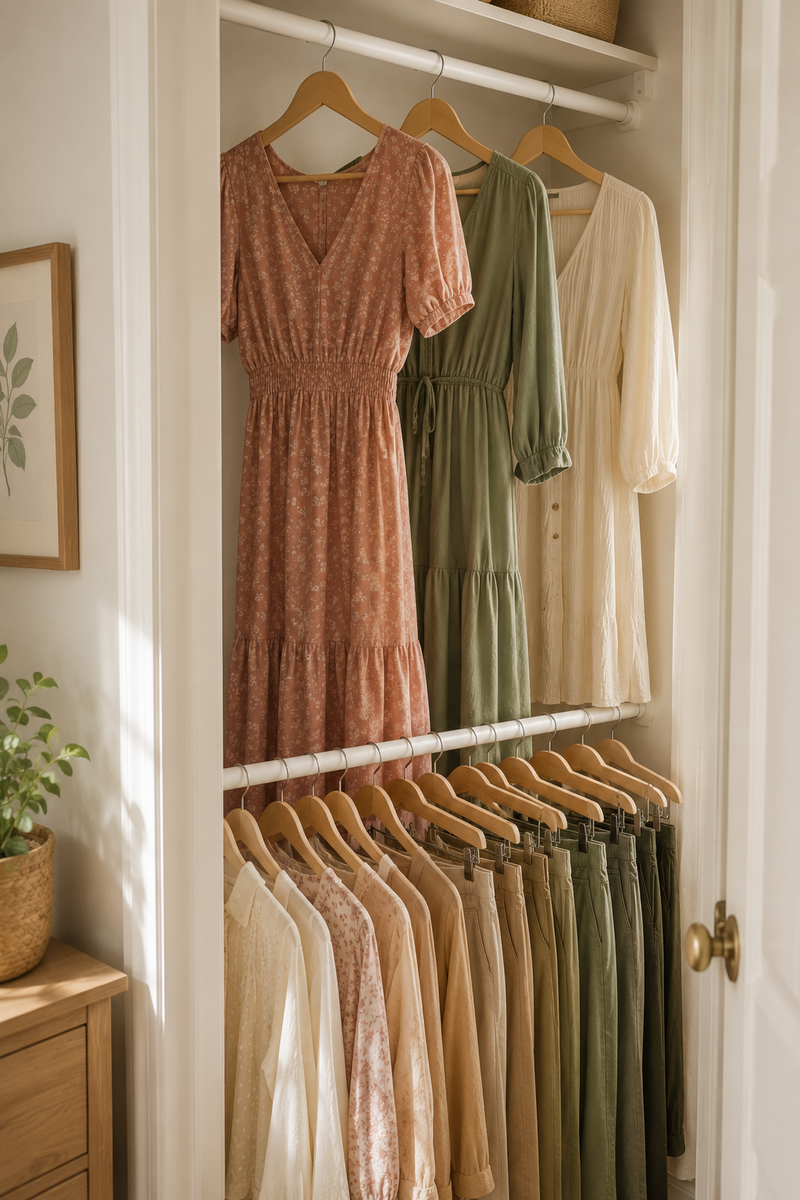
Fix the rod first, because it’s the one zone doing the most work for the least return in most closets. Switch to slim, matching hangers, add a second hanging rod below the existing one for shorter items, and sort by category and color so you can find anything in under ten seconds. Together, these three changes typically free up 12 to 18 inches of horizontal rod space in a standard 4-foot closet.
Most closets are built for one rod at roughly 66 inches off the floor, which leaves 30 to 40 inches of dead air underneath if you’re only hanging full-length items like dresses and coats. Shirts, folded pants on hangers, and skirts don’t need that much clearance. A tension-mounted double rod, usually $15 to $25 and requiring no drilling, drops a second bar in below the first, and instantly doubles your hanging capacity in that section. Check the weight rating before buying. A closet-rated tension rod typically holds 20 to 30 pounds evenly distributed, enough for a full second row of shirts, blouses, or folded pants, but a cheaper curtain-style tension rod isn’t rated the same way and will sag within a month.
Reserve the top rod for anything that actually needs the full drop: maxi dresses, long coats, jumpsuits. Move everything else down to the second rod, where it belongs.
Hanger uniformity matters more than it sounds like it should. A closet with wire hangers, thick plastic ones, and a few wooden ones mixed together doesn’t just look messy. Different thicknesses mean clothes bunch unevenly, and the whole rod ends up wider than it needs to be. A single matching set of slim hangers (velvet-flocked ones run about 0.5 inches thick versus 1.5 inches for a standard plastic hanger) usually costs $20 to $30 for a full closet swap of 30 to 50 hangers. It’s one of the cheapest single upgrades in this entire guide relative to the space it returns, and it’s the first thing to buy if the budget is tight.
Once the rod itself is sorted, group by type first (tops, then bottoms, then dresses), and by color second within each group. This isn’t just about looking tidy for its own sake. It’s what makes a 15-second closet decision possible on a weekday morning instead of a five-minute dig through everything you own.
If you’re renting and the closet has no second rod bracket to attach to, look for a tension-mounted version specifically, since it clamps between the side walls instead of needing screws into the existing rod. Most install in under five minutes with no tools at all.
The Floor: Reclaim It From Shoe Piles and Bins
Closet floors collapse into chaos because they become the default dumping ground for anything that doesn’t have an assigned spot: shoes kicked off in a pile, a laundry hamper, an empty suitcase, a box of things “to deal with later.” Fixing the floor means giving every item on it a container or a rack, so nothing sits loose on the ground.
A slim shoe rack, usually 10 to 14 inches deep and stackable, along one side wall holds 6 to 10 pairs in the same footprint that 4 loose pairs currently take up scattered across the floor. Angle it against a side wall if the closet is narrow, so the door still swings clear. For anything beyond regular rotation, like off-season boots or rarely-worn heels, a labeled bin under the hanging clothes uses the dead space beneath your shortest hanging items instead of competing with the shoe rack for floor room.
If the closet floor is also home to a hamper, that’s usually the first thing to relocate. A standard hamper takes up roughly 2 square feet of prime floor real estate for something that gets emptied once a week. A slim, over-the-door mesh hamper, or one tucked just outside the closet in the bedroom itself, almost always frees up more usable floor space than it costs in convenience.
Suitcases and rarely-used bags are the other common floor clutter. A flat under-bed suitcase, if you have any clearance under the bed frame, moves that bulk out of the closet entirely and gives the floor zone back to daily-use items. If under-bed storage isn’t an option, a slim rolling suitcase stood on its end in the back corner of the closet, behind the shoe rack, takes up a fraction of the space a suitcase lying flat would need.
The test for the floor zone is simple: everything on it should be something you’d actually grab in the next seven days. Anything else, including that empty suitcase, belongs on the shelf zone instead, which is built for exactly that kind of occasional-use storage.
The Shelves: Build a System That Doesn’t Collapse Under Off-Season Clothes
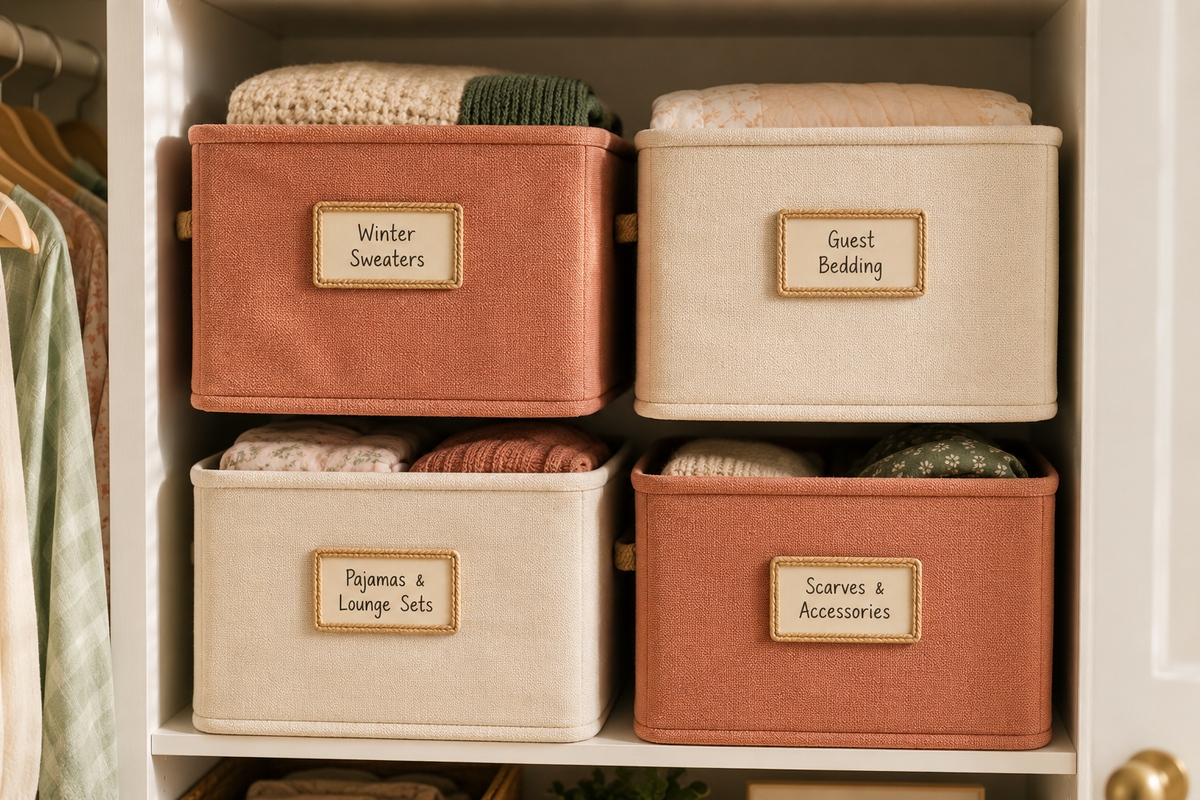
A single shelf above the rod, loaded with a shifting pile of sweaters and blankets, is one of the most common failure points in a small closet. The fix isn’t a bigger shelf. It’s stackable bins that turn one flat surface into three or four defined compartments, each with its own contents and its own label.
Uniform, stackable bins, whether fabric or clear plastic, typically run $8 to $15 each and let you build vertically instead of piling loose. A single 12-inch-deep shelf can hold two rows of bins stacked two-high, which roughly triples what that shelf can actually store compared to one loose pile that inevitably topples the first time someone grabs something from the middle.
Label every bin with what’s inside, not a vague category. “Winter sweaters” and “guest bedding” tell you exactly what you’re reaching for. “Misc” doesn’t, and a bin labeled “misc” is usually the one nobody opens again until it’s time to move out. Handwritten labels on a woven tag work just as well as a printed label maker version, so this doesn’t need to be an added expense.
If the shelf sits high enough that reading a label from the floor is difficult, a small step stool kept just inside the closet solves that faster than constantly guessing what’s inside each box, or standing on a chair that shouldn’t be in a closet in the first place.
Rotate seasonally. Whatever’s out of season goes to the back or top of the shelf stack, and whatever’s in season stays front and eye-level. This single habit, repeated twice a year at the seasonal swap, is what keeps the shelf zone from becoming a permanent archive of things you never touch again.
For anything genuinely fragile or sentimental, like holiday ornaments or keepsake boxes, a lidded bin rather than an open one protects the contents from the dust that naturally settles on an open closet shelf over months of not being touched.
The Space Above the Door: The Most Wasted Real Estate in Any Closet
The area above a standard closet door, roughly 6 to 8 inches of clearance between the door frame and the ceiling, sits empty in almost every small closet, even ones that are otherwise packed tight. An over-the-door organizer or a slim floating shelf mounted just above the frame turns that dead strip into dedicated storage for exactly the kind of items that don’t fit neatly anywhere else: extra hangers, a sewing kit, gift wrap, or a rarely-used travel bag.
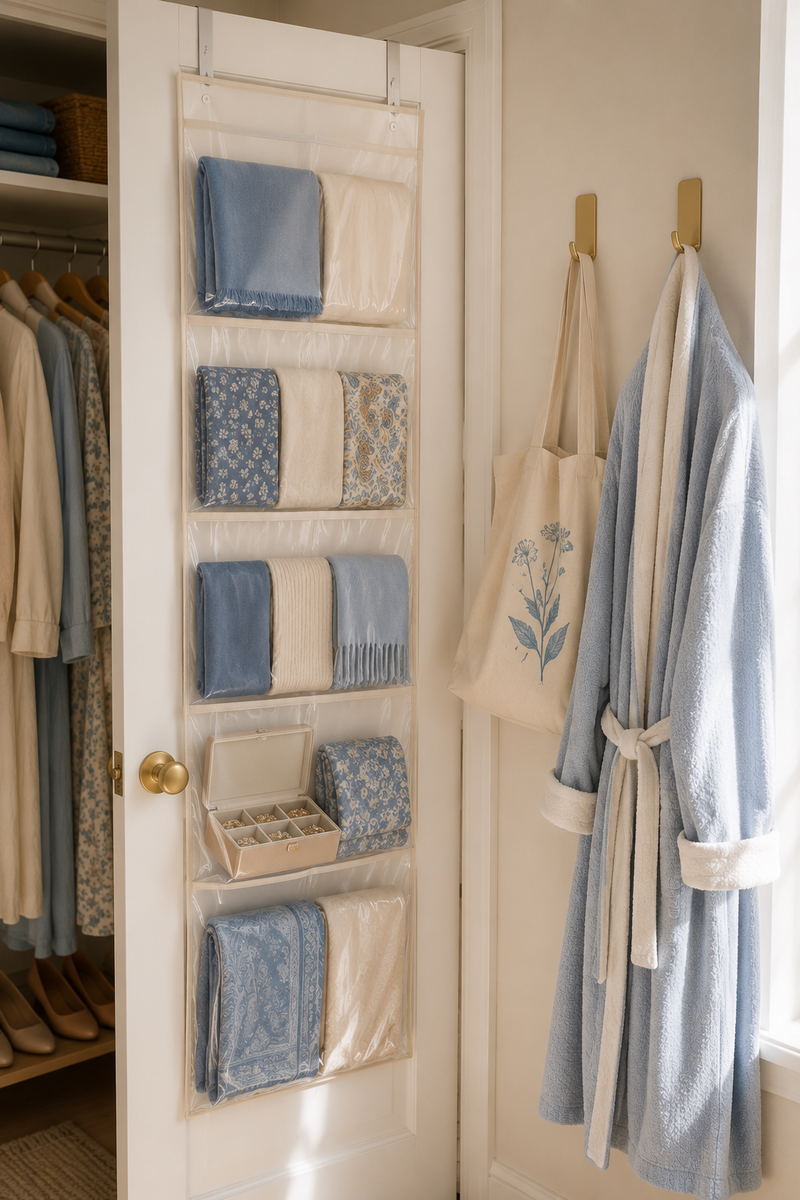
Over-the-door organizers with clear pockets, usually $15 to $20 and needing no tools or drilling, hang directly on the door itself and work well for smaller, flatter items like jewelry, scarves, belts, or a first-aid kit. If the space is above the door frame rather than on the door, a slim 6-inch-deep floating shelf works better for bins. Some rental-friendly versions use adhesive strips rated for 10 to 15 pounds instead of screws, which makes them safe to remove without patching a wall when you move out.
Use this zone for genuinely occasional items only: holiday decor, an out-of-season handbag rotation, spare bedding you only pull out when guests stay over. Because it’s the hardest zone in the closet to physically reach, it should hold only things you access a handful of times a year, never anything you’d want on a Tuesday morning.
The key with this zone is restraint. Anything in weekly or monthly rotation belongs on the main shelf where it’s actually visible and accessible, not tucked above a door where you’ll genuinely forget it exists within a couple of months.
The Back of the Door and Walls: Small Additions With Big Payoff
Beyond the space above the door, the door itself and the closet’s side walls are the last stretch of unused square footage in most small closets. A shallow rack, 2 to 4 inches deep, mounted directly on the back of the door works for shoes, accessories, or cleaning supplies without adding any bulk to the closet’s interior footprint. Command hooks rated for 5 to 7 pounds each, spaced along a side wall, hold bags, belts, or a hanging jewelry organizer, and remove cleanly from rental walls without damage when it’s time to move.
This zone is where a lot of small daily-use items find a permanent home instead of floating loose on a shelf or the floor. A hook for tomorrow’s bag, one for a robe, one for a reusable tote you grab on the way out. These small, specific assignments are often what makes a system stick, because there’s a designated spot instead of a vague “somewhere in the closet” that new items drift toward once the novelty of the fresh setup wears off.
A slim mirror on the inside of the door, if there’s room for it, uses the same square footage a shelf would need but adds a genuinely useful function that most small closets are missing entirely: somewhere to check an outfit before walking out the door.
Maintaining It: A 10-Minute Weekly Reset
A closet organized once and never revisited drifts back to chaos within a month, usually because new items enter the system without ever being assigned a zone. A short weekly reset, done every Sunday or whenever the week’s laundry gets put away, keeps the whole four-zone system intact.
The reset takes about 10 minutes. Return anything that’s drifted out of its zone, like a shoe on the floor that belongs on the rack, or a sweater on the rod that belongs in a bin. Re-fold anything in the bins that’s started to slump. Then do a 30-second scan for anything that no longer earns its spot. If a bin is overflowing, that’s the signal to declutter that specific category rather than buying another bin, since more storage rarely solves a volume problem. It just delays it by a few months.
This is the step most small closet systems skip, and it’s the one that actually determines whether the work from this guide lasts three weeks or three years. A closet that gets a 10-minute reset every week almost never needs a full weekend overhaul again, because nothing has time to pile up past the point of a quick fix.
FAQ
How do I organize a small closet with no extra storage budget? Start with what’s free: regroup by category and color, move off-season items to the back, and clear the floor of anything that doesn’t need to be there. These three changes cost nothing and often reveal how much of the current mess is really just disorganization, not lack of space.
What’s the cheapest single upgrade for a small closet? A matching set of slim hangers, usually $20 to $30 for a full closet swap. It’s the one change that reduces rod width immediately without requiring any new fixtures.
Do tension rods actually hold real weight? A quality tension rod rated for closet use typically holds 20 to 30 pounds evenly distributed, enough for a full second row of shirts, blouses, or folded pants. Check the weight rating before buying, since cheaper curtain-style tension rods aren’t rated the same way.
How often should I go through my closet and declutter? Twice a year lines up naturally with seasonal clothing swaps. Anything that hasn’t been worn in a full year through both a warm and cold season is a strong candidate to donate or remove.
What if my closet has no shelf at all, just a rod? A freestanding shelf unit or a slim wire shelving kit, many rental-friendly versions clip onto the existing rod bracket without drilling, adds a shelf zone to a rod-only closet in under 15 minutes.
Is it worth buying a full closet system kit instead of doing this piece by piece? Only if the closet is a genuinely awkward shape or you want everything installed in a single weekend. For most standard reach-in closets, the piece-by-piece approach in this guide costs less overall and lets you fix the specific zone that’s failing first.
Related Reading
If your closet came with exactly one rod and one shelf, Closet Systems That Fit a Small Space Without a Renovation goes deeper on the specific tension rods, add-on shelving, and stackable units that install in an afternoon.
Once the everyday system is in place, How to Store Off-Season Clothes in a Closet With No Extra Room covers the vacuum bags and under-bed bins that keep the rod free of clothes you’re not wearing this month.
And if the floor zone in your closet is really a shoe problem, Shoe Storage Ideas for Closets With Zero Floor Space Left walks through the over-the-door and stackable options built specifically for that.
For the full category, browse Closet Organization under the Organization & Storage hub, the home for every small-closet, decluttering, and storage-system guide on the site. And if the closet is really one piece of a bigger small-bedroom puzzle, the Small Bedrooms hub covers everything else in the room around it.