Table of Contents
A studio apartment is one room asked to do the job of four: bedroom, living room, kitchen, and office. That’s the entire challenge, and it’s also the entire opportunity. You don’t have walls to hide behind, so every decision, from where the bed goes to which rug you choose, has to work harder than it would in a house with doors between rooms.
The good news: studios are one of the most solvable small-space problems out there, because the fix isn’t more square footage. It’s better zoning, right-sized furniture, and a handful of visual tricks that trick the eye into reading one room as several distinct spaces. You don’t need a renovation, a landlord’s permission, or a five-figure budget to pull this off. You need a plan, and this guide is that plan, in order: zoning first, then furniture, then the visual layer that makes it all click.
Start With Zoning, Not Furniture
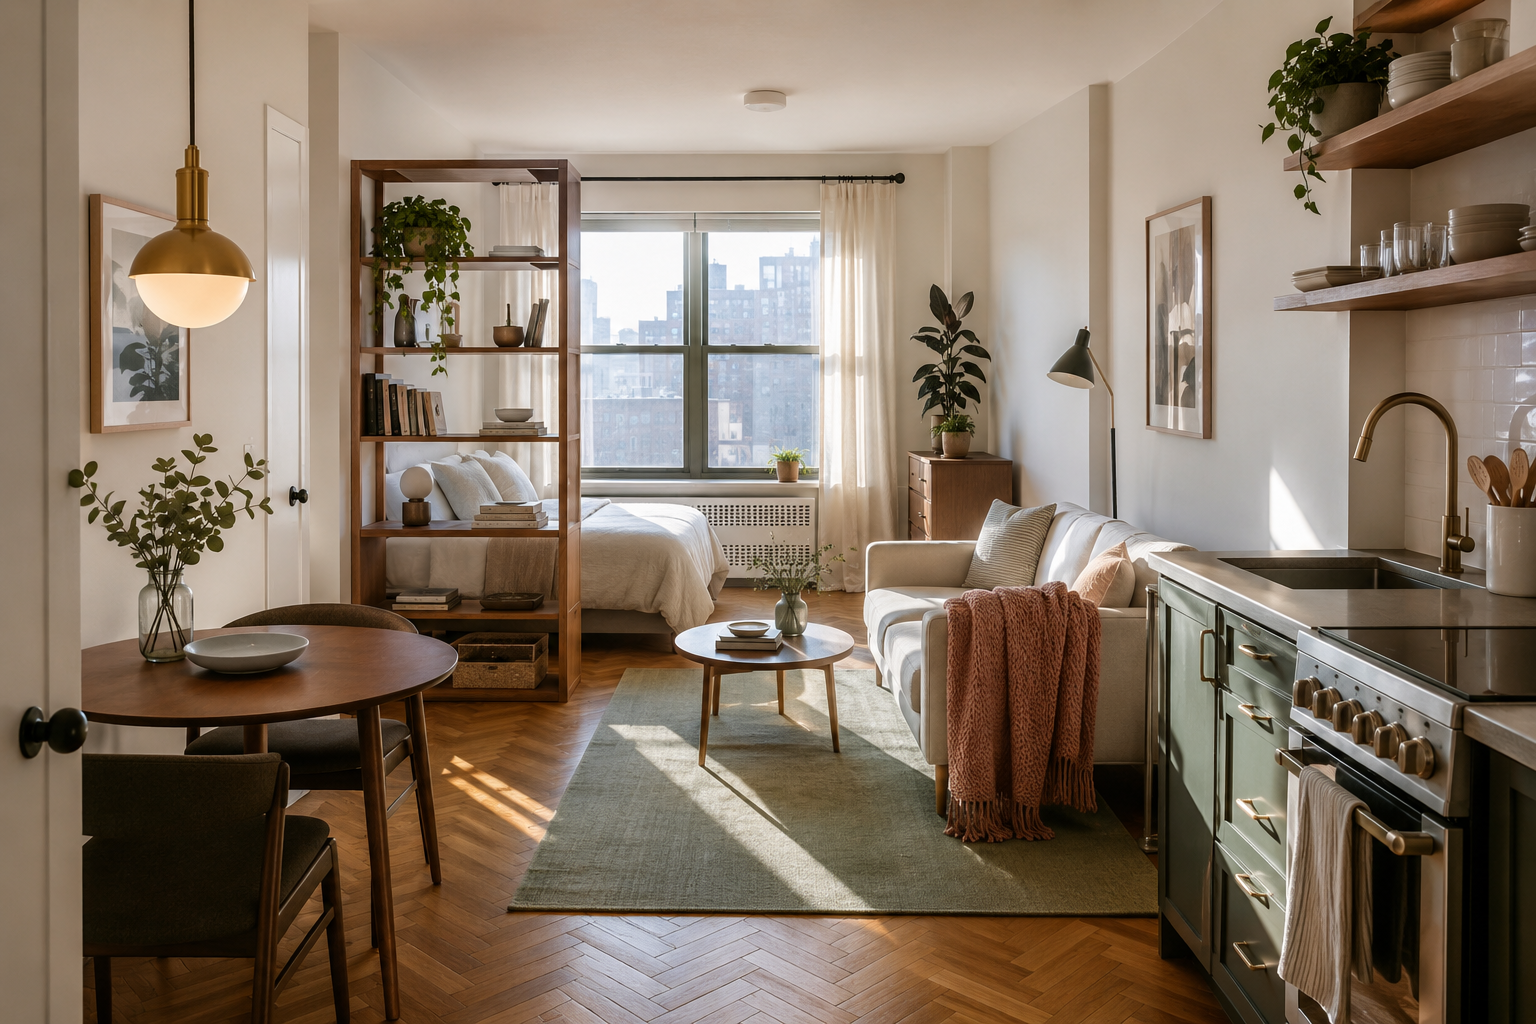
Zone your studio before you buy a single piece of furniture. Zoning means mentally (and visually) dividing your one room into distinct areas, sleep, living, work, and eat, using rugs, lighting, and furniture placement instead of walls. Get the zones right first and every furniture decision after that becomes obvious instead of guesswork.
Most people do this backward. They buy a bed, a sofa, a desk, and a dining table, then try to Tetris them into the room and wonder why it feels chaotic. The room feels chaotic because nothing has told your eye where one “room” ends and the next begins. Your brain reads open floor space as one undifferentiated blob, and a blob feels smaller and messier than the same square footage would if it were split into defined zones.
Here’s the fix. Walk your studio and mentally rope off three or four zones based on how you actually live, not how a floor plan says you should. If you eat dinner on the couch every night and never use a dining table, don’t force one in. If you work from home five days a week, your desk zone deserves prime real estate near the best natural light, even if that means your bed goes in a dimmer corner.
Once you know your zones, define their edges with three tools:
- Rugs. A rug under your living area, sized to fit your seating (all front legs of the sofa and chairs on it, minimum), tells your eye “this is the living room” the second you glance at it. A different rug, or bare floor, under your bed signals a separate zone even with zero walls between them.
- Lighting. Overhead light reads as one flat, undivided space. Layered lighting, a floor lamp by the sofa, a table lamp by the bed, under-cabinet lighting in the kitchenette, creates visual “rooms” through light pools instead of walls. This is one of the fastest, cheapest zoning tools available and it requires zero drilling.
- Furniture placement, not furniture size. A tall open bookshelf, positioned perpendicular to a wall rather than flush against it, creates a soft divider between your sleep and living zones without blocking light or making the room feel chopped up. This works even in a studio under 350 square feet, where a solid wall-height divider would feel claustrophobic.
If your studio has an obvious architectural anchor, a nook, an alcove, a step in the ceiling height, use it. Let the bed go in the nook even if that’s not the “obvious” bedroom spot. Studios reward working with the room’s real shape instead of an imaginary rectangle.
If you want the deeper walkthrough on this exact system, Zoning a Studio Without Walls or Furniture Dividers breaks down room-by-room zoning combinations for studios from 300 to 600 square feet, including what to do when your kitchen and living area share one long wall.
Furniture Scale: The Difference Between Cozy and Cramped
Furniture scale determines whether a studio feels intentional or crowded, and it matters more than the total number of pieces in the room. The rule: every piece should be sized to the zone it’s in, not to what looks good in a furniture showroom or a Pinterest photo shot in a much larger space.
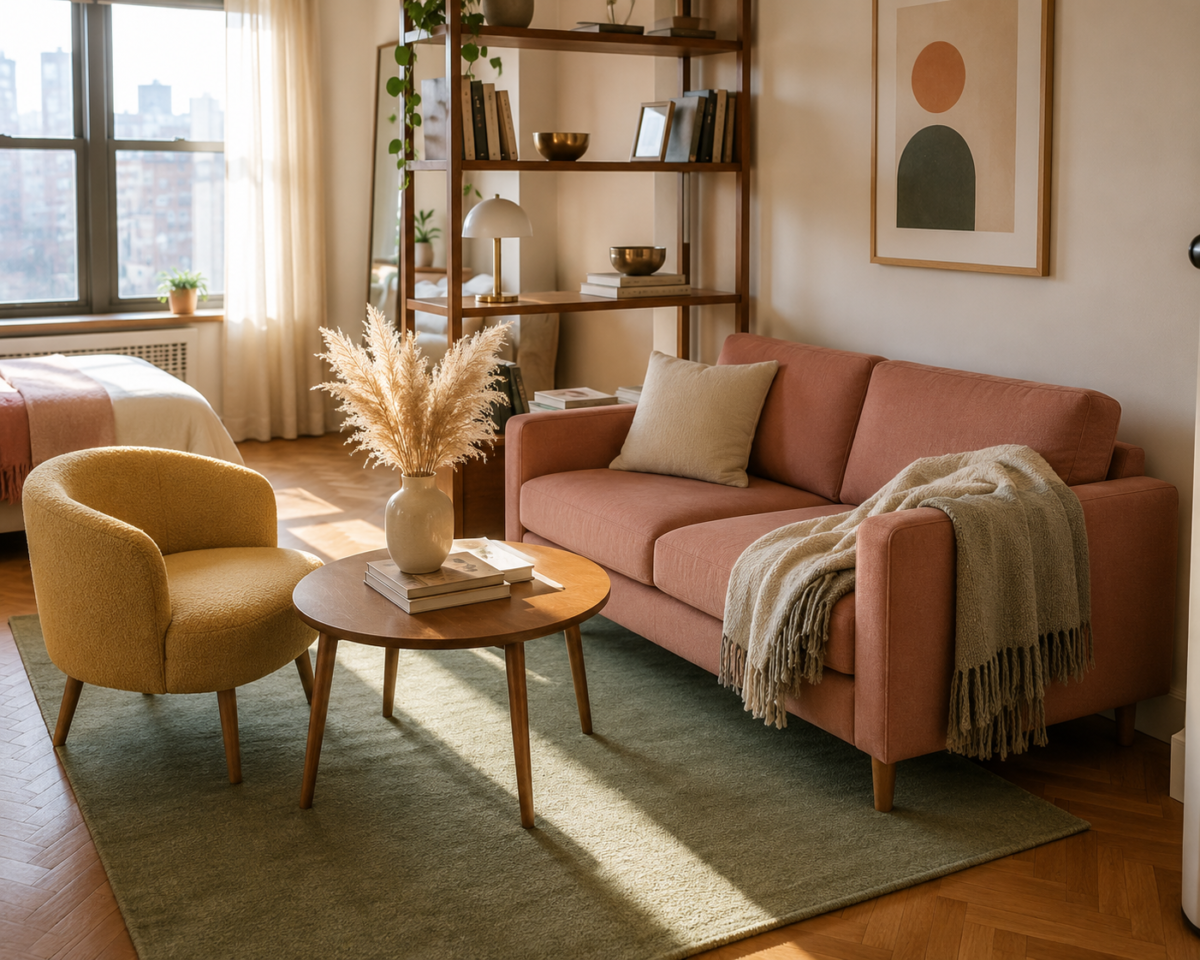
A full-size, deep-seat sectional built for a suburban family room will visually eat 30 to 40 percent of your available floor space in a studio, even if it technically fits. The fix isn’t to avoid a sofa. It’s to choose a slim-arm, two-seater or apartment-size sofa (typically 60 to 72 inches wide, with arms under 6 inches) instead of the 84-plus-inch showroom standard.
A few scale rules that hold up across almost every studio layout:
- Legs, not skirts. Furniture with visible legs (sofas, chairs, beds, dressers) lets light and floor pass underneath, so the eye reads more open floor space even when the footprint is identical to a skirted piece. This single swap can make a room feel noticeably more spacious with zero change to your actual square footage.
- One statement piece per zone, not five small ones. A studio filled with lots of small furniture (side tables, ottomans, extra chairs) reads busier than one with fewer, slightly larger, well-chosen pieces. Pick your one hero piece per zone and edit everything else down.
- Multi-purpose over single-purpose, but only when it’s genuinely useful. A storage ottoman that doubles as a coffee table and extra seating earns its spot. A “convertible” piece you’ll never actually convert doesn’t; it just adds bulk for a feature you won’t use.
- Round tables in tight walkways. A round coffee table or dining table has no corners to bump into or visually block a sightline, which matters enormously in a studio where your main walking path might be 30 inches wide.
- Leave walking paths of at least 30 inches, and ideally 36, between major pieces. This is the single most common studio furniture mistake: buying enough furniture to fill the room, then realizing there’s nowhere left to actually walk through it.
For your bed specifically, a queen frame with exposed legs (or better, a platform bed with built-in drawer storage underneath) will almost always outperform a bulky upholstered frame with a solid skirt, both for airflow and for the visual weight it carries in the room.
If you want exact sizing guidance by zone, down to specific inch measurements for sofas, beds, and desks that work in one-room living, Furniture Scale That Actually Works in One Room walks through it piece by piece.
Storage That Works Without Extra Square Footage
In a studio, storage has to be vertical, multi-purpose, or hidden, because you rarely have a spare closet or extra room to dedicate to it. The reader who searches “studio apartment storage” almost always means one specific thing: where do I put my stuff when there’s no extra room for it?
Start by auditing what actually needs to live in your main living space versus what can move under, over, or behind something else:
- Under the bed is the single most underused storage zone in most studios. A platform bed with built-in drawers, or simply enough clearance for flat under-bed bins, can absorb off-season clothing, extra linens, or bulky items that would otherwise clutter a closet.
- Vertical wall storage, floating shelves, a tall bookshelf, wall-mounted cabinets above a kitchenette, uses your ceiling height instead of your floor. Studios almost always have more unused vertical space than horizontal space, and vertical storage doesn’t compete with your walking paths.
- Behind-door storage (over-the-door shoe organizers, slim behind-door racks) recovers space that’s otherwise completely dead, since the back of a closet or entry door is rarely used for anything.
- Ottomans, benches, and coffee tables with hidden storage double as both seating and a place for blankets, remotes, or mail you don’t want visible.
A quick, honest gut check: if a piece of furniture doesn’t have a clear job and a clear zone, it’s not adding function, it’s just adding clutter dressed up as decor. That’s not a rule against decorative objects; it’s a filter for deciding what earns a spot in a room with genuinely limited real estate.
If storage is your biggest pain point specifically, the deeper system for maximizing every inch, including closet-adjacent solutions for studios without a real closet, lives in Closet Organization over in the Organization & Storage hub, and pairs well with everything in this guide.
Visual Tricks That Make a Studio Feel Bigger
Color, mirrors, and sightlines can make a studio feel noticeably larger without adding a single square foot, and they cost far less than any structural change. This is the layer most people skip, and it’s often the difference between a studio that feels “small but fine” and one that feels genuinely spacious.
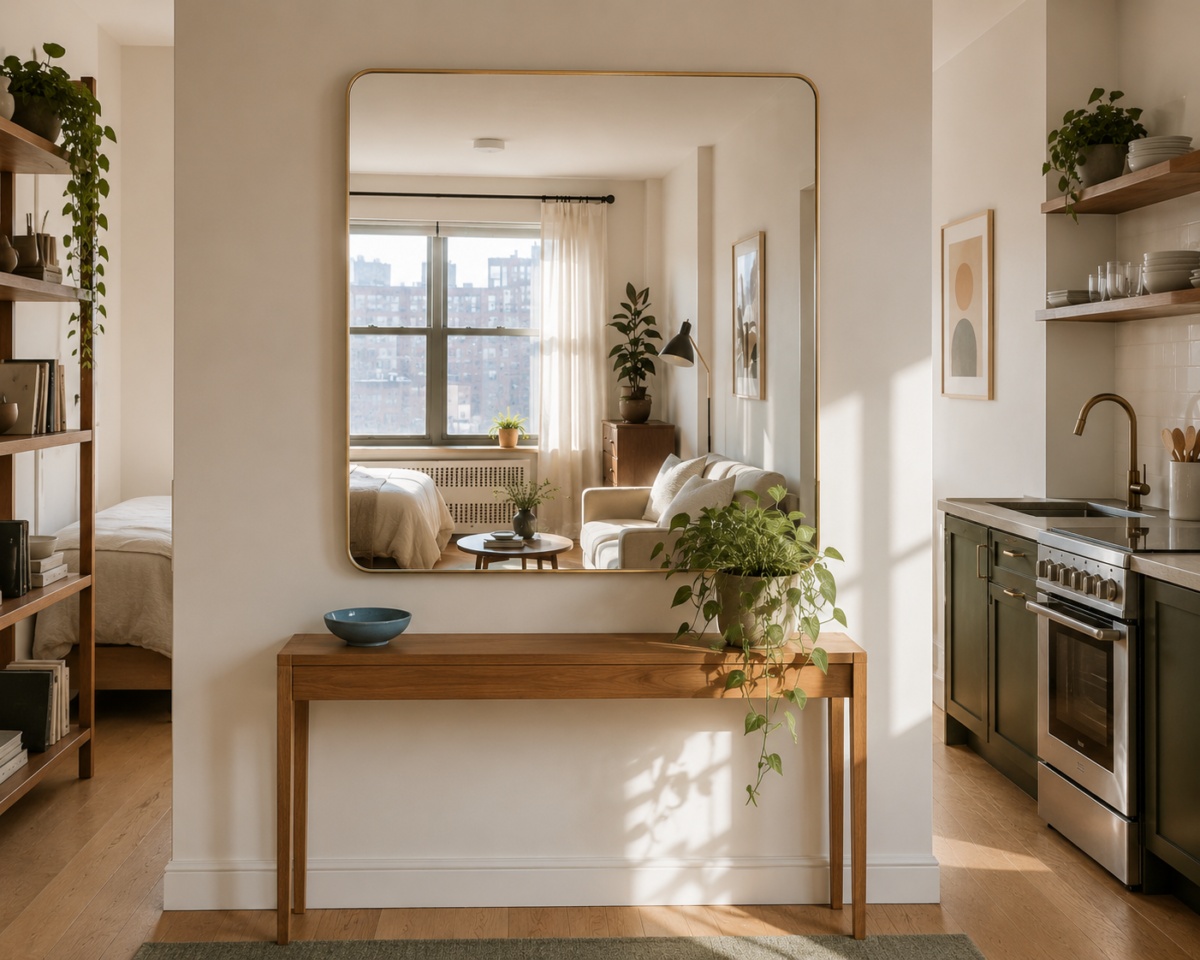
A large mirror placed directly across from your main window does two things at once: it bounces natural light deeper into the room, and it visually doubles your sightline, since your eye reads the reflected room as additional depth. This is one of the highest-impact, lowest-cost changes available in a rental, and it requires nothing more than a hook or a leaning frame against the wall.
Beyond mirrors, a few other tricks consistently move the needle:
- Keep your color palette tight and light. A studio painted (or decorated, in a rental where paint isn’t allowed) in a narrow range of soft, light tones reads as more open than the same room broken into several bold, competing colors. This doesn’t mean everything has to be white; a soft sage, warm cream, and one grounding neutral can coexist without visually fragmenting the space.
- Match your curtain color to your wall color, and hang curtains close to the ceiling rather than at the window frame. This stretches your sightline vertically and removes a visual “stop point” partway up the wall.
- Keep sightlines clear from your entry. Whatever you see first when you walk in sets the tone for how the whole room feels. A cluttered first sightline reads as a small, cramped apartment even if the rest of the room is well organized. Position your tallest or busiest furniture out of that direct line of sight.
- Use one dominant rug and floor treatment, rather than switching flooring or rug styles zone to zone. A visually continuous floor plane, even with different rugs marking zones, reads as one larger space rather than several small, disconnected ones.
None of this requires a renovation or a paint-friendly lease. It requires being deliberate about what your eye lands on first, and how far it’s allowed to travel before it hits a visual stop.
For the full breakdown, including specific mirror placement diagrams and color palettes tested across real small studios, Making a Studio Feel Bigger Than It Is goes deeper into this exact topic.
Putting It Together: A Realistic Studio Layout
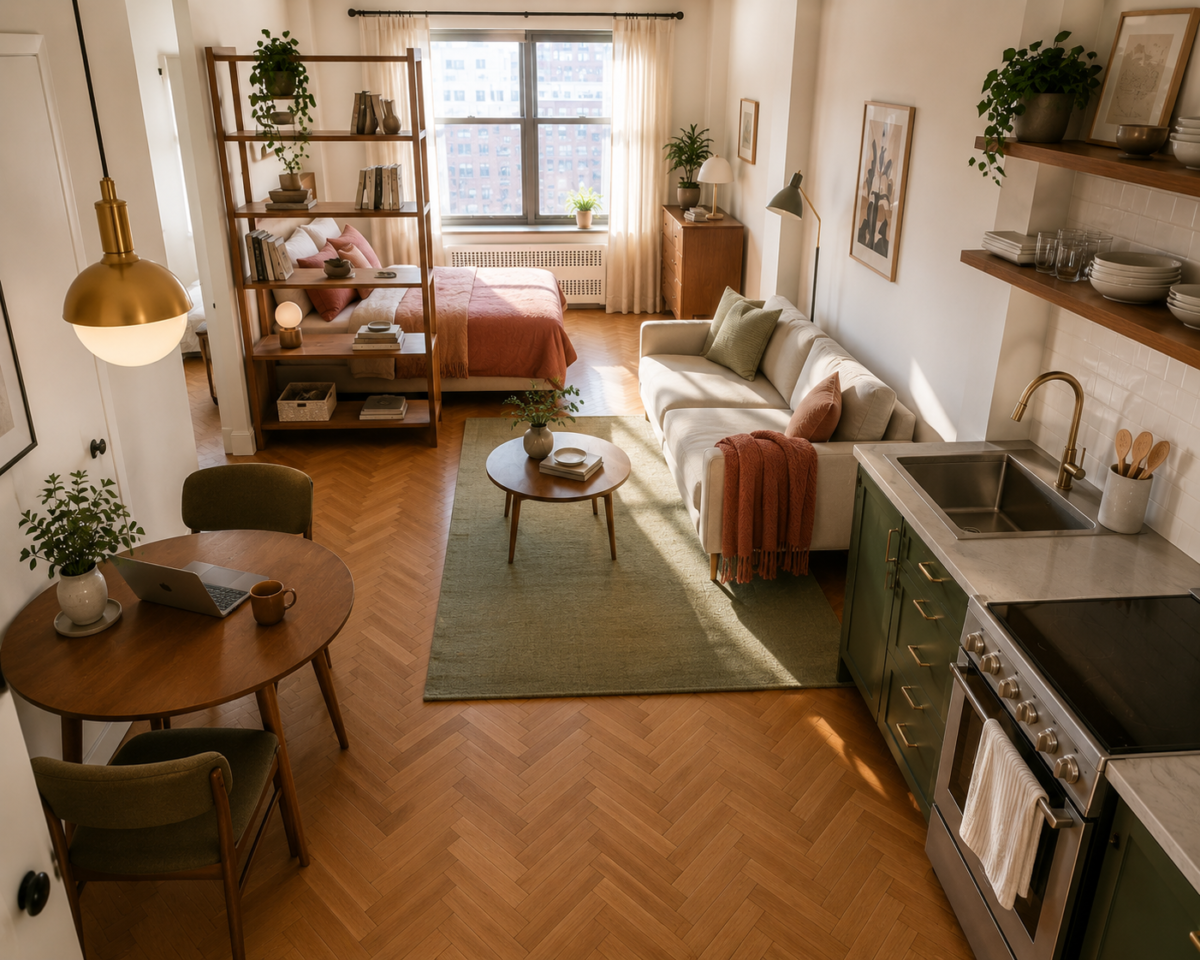
Here’s how zoning, furniture scale, and visual tricks actually combine in a real studio. Picture a 425-square-foot studio with one large window on the far wall and the entry on the opposite short wall. Your sleep zone anchors the far corner, away from the entry sightline, defined by a rug and a slim open bookshelf angled as a soft divider. Your living zone sits under the window, where the light is best, on a rug sized to hold your sofa and one accent chair. Your kitchenette runs along the entry wall, with open vertical shelving instead of bulky upper cabinets. A small round table near the kitchenette handles both meals and desk work, since most studios don’t have room for two separate zones doing the same basic job.
That’s the whole system: zones defined by rugs and light, furniture scaled to fit each zone without blocking the 30-plus-inch walking path between them, and a mirror across from the window doing double duty as both decor and a light amplifier. Nothing about this layout requires drilling, painting, or landlord approval, and every piece of it works in a studio anywhere from 300 to 600 square feet with minor adjustments.
Common Studio Apartment Mistakes to Avoid
A few mistakes show up again and again in studios, and almost all of them come from applying house-sized habits to a one-room space:
- Buying furniture before measuring the room. A sofa that looks reasonably sized online can dominate a studio the second it’s delivered. Measure your zones first, including walking paths, and shop to those exact dimensions.
- Facing the bed toward the entry. Waking up (and coming home) to a direct sightline of your bed makes the whole apartment feel like one giant bedroom. Angle it, or divide it, whenever the layout allows.
- Treating the kitchenette as an afterthought. It’s often the messiest-looking zone precisely because it gets the least intentional storage planning. Vertical shelving and a couple of matching containers go a long way here.
- Skipping window treatments because “it’s just one room.” Bare windows, especially at night, make a studio feel exposed and unfinished. Simple, ceiling-hung curtains in a color close to your wall finish solve this without adding visual clutter.
- Overfilling every wall. A studio needs breathing room on at least one or two walls. Filling every surface with shelving or art leaves the eye nowhere to rest, which paradoxically makes the room feel smaller, not more curated.
Fix these five and most of the “why does my studio feel cramped” feeling resolves on its own, often before you’ve spent a single dollar on new furniture.
The Studio That Actually Feels Like Home
Done right, a studio doesn’t read as one compromised room. It reads as a small, intentional apartment with a real bedroom corner, a real living area, a real place to eat, and a real place to work, each one visually distinct even though nothing physically separates them. That’s the whole goal: not to disguise that it’s a studio, but to make the one room work exactly as hard as it needs to for the life you’re actually living in it.
Frequently Asked Questions
How do I divide a studio apartment without a wall? Use rugs, lighting, and furniture placement instead of walls. A rug under your living area and a different one (or bare floor) under your bed signals separate zones instantly. A tall, open bookshelf placed perpendicular to a wall creates a soft physical divider without blocking light, and layered lighting (a floor lamp here, a table lamp there) creates the sense of distinct “rooms” through pools of light.
What size sofa fits in a studio apartment? Look for a slim-arm, two-seater or apartment-size sofa, typically 60 to 72 inches wide, rather than the 84-plus-inch standard sold in most furniture showrooms. Choose a frame with visible legs rather than a solid skirt, since exposed legs let light pass underneath and make the piece feel lighter in the room.
Where should the bed go in a studio apartment? Place the bed in the corner or zone farthest from your entry sightline, ideally using an architectural anchor like a nook or alcove if your studio has one. Avoid facing the bed directly toward the door, since that sightline makes the whole apartment read as one bedroom instead of a multi-zone living space.
How can I make my studio apartment feel bigger without renovating? Hang a large mirror directly across from your main window to bounce light deeper into the room and visually double your sightline. Keep your color palette tight and light, hang curtains close to the ceiling rather than at the window frame, and keep your entry sightline clear of tall or busy furniture.
Do I need a dining table in a studio apartment? Only if you’ll genuinely use it. A small round table that handles both meals and desk work is usually a better fit for a studio than two separate single-purpose zones. If you already eat on the couch most nights, a compact bar cart or drop-leaf table you can fold away often serves better than a fixed dining table taking up permanent floor space.
How much storage do I need in a studio apartment? Enough to get everything off the floor and out of your main sightlines, which usually means leaning on under-bed storage, vertical wall shelving, and one or two multi-purpose pieces like a storage ottoman, rather than adding several single-purpose storage furniture pieces that each eat their own footprint.
Related Reading
- Zoning a Studio Without Walls or Furniture Dividers — the full room-by-room breakdown of the zoning system introduced above, with layouts for studios from 300 to 600 square feet.
- Furniture Scale That Actually Works in One Room — exact sizing guidance, by zone, for sofas, beds, and desks that won’t overwhelm a one-room layout.
- Making a Studio Feel Bigger Than It Is — mirror placement, color strategy, and sightline tricks explored in full depth.
- Closet Organization — storage systems for studios without a real closet, from the Organization & Storage hub.
- Parent Category: Studio Apartments
- Parent Hub: Apartments & Rentals