Table of Contents
Stand in the middle of your studio right now and look around. If you can’t immediately tell where your “bedroom” ends and your “living room” begins just by looking, that’s not a decorating problem. It’s a zoning problem, and it’s the single most common reason a studio feels smaller and messier than its actual square footage.
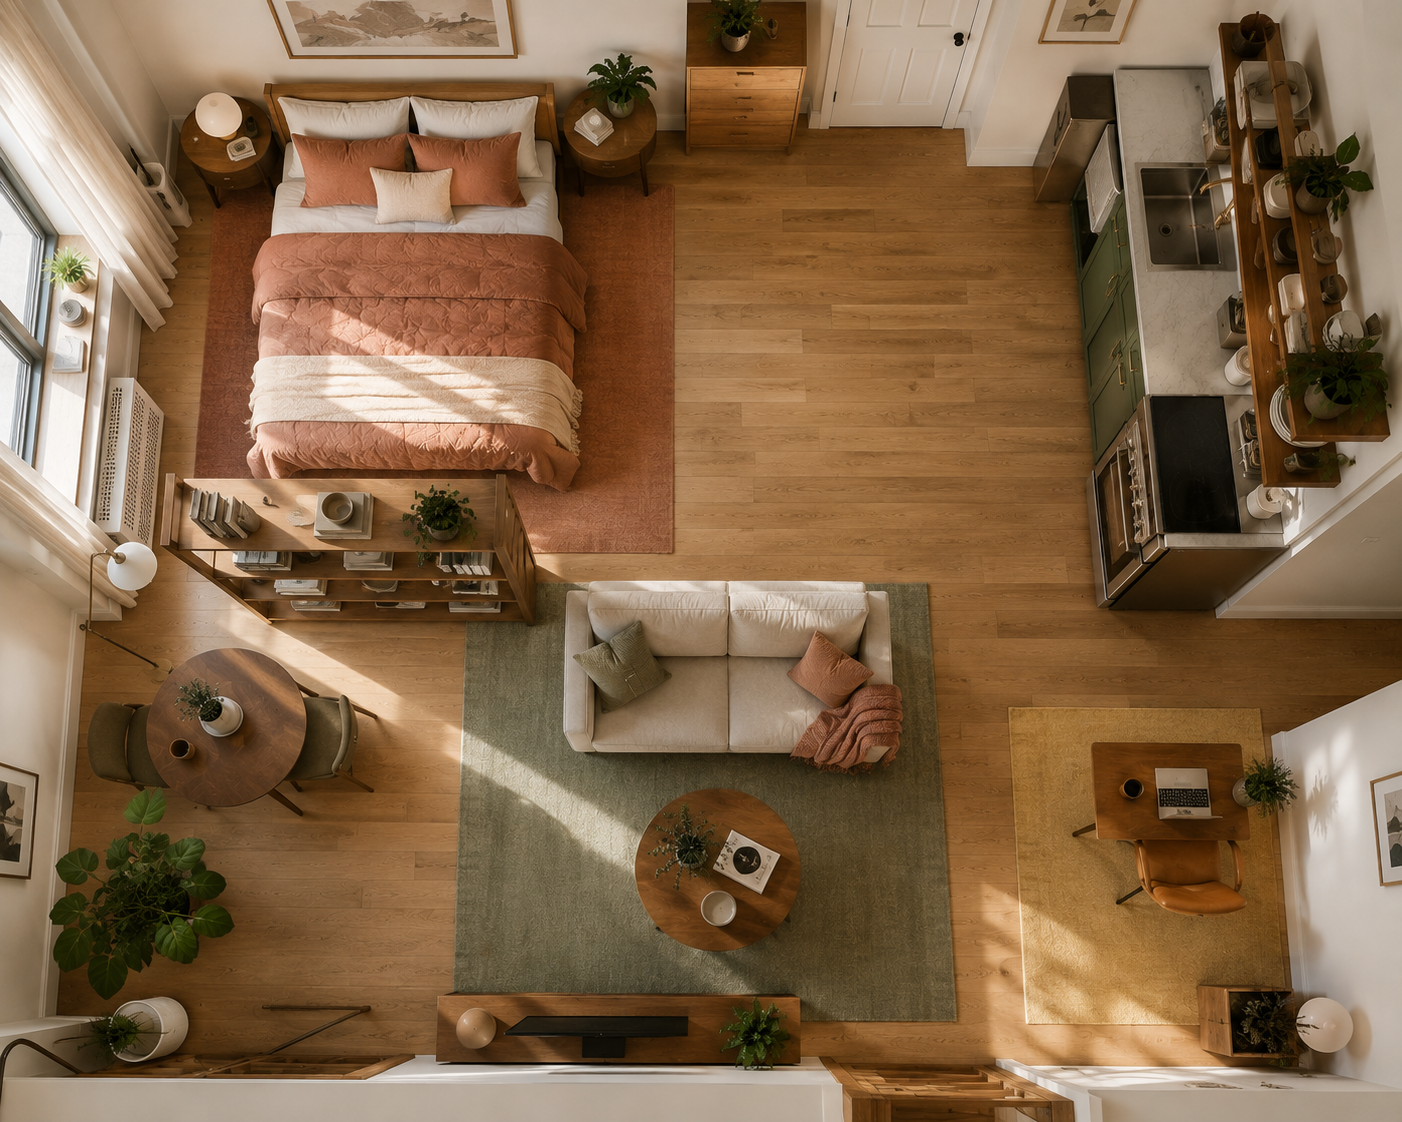
Zoning means dividing one room into distinct, purposeful areas, sleep, living, kitchen, work, using rugs, lighting, and furniture placement instead of walls. Get this right and a 400-square-foot studio can read as four small, intentional rooms. Get it wrong, and even a 600-square-foot studio reads as one chaotic, undivided space. The difference isn’t square footage. It’s whether your eye can tell, at a glance, what each part of the room is for.
This guide walks through the exact system, zone by zone, so you can apply it to your own layout regardless of where your windows, doors, or awkward angles happen to fall.
Why Zoning Matters More Than Square Footage
Two studios can be the exact same size and feel completely different, and the deciding factor is almost never the furniture itself. It’s whether the room has been organized into legible zones. An unzoned studio forces your brain to process the entire space as one flat area every time you walk in, and that mental load reads as visual clutter even in an objectively tidy room.
A zoned studio does the opposite. Your eye lands on the sofa and rug and immediately registers “living area,” then shifts to the bed and registers “sleep area,” without you consciously thinking about it. That instant legibility is what makes a small space feel calm instead of cramped. It’s also the reason two people can walk into the same 350-square-foot studio and have completely different reactions, one sees a cozy, well-organized apartment, the other sees a cluttered dorm room. The room didn’t change. The zoning did.
Furniture Scale That Actually Works in One Room covers how to size the furniture inside each zone once you’ve mapped them out, so the two systems work best together rather than in isolation.
The Three Tools That Replace Walls
Before mapping individual zones, it helps to understand the three tools doing all the actual work. Every zoning strategy in this guide comes back to these.
Rugs are the fastest, cheapest zoning tool available, and they work in any rental regardless of flooring type. A rug placed under your seating area, sized so every front leg of the sofa and chairs sits on it, visually declares “this is the living room” the instant you look at it. A separate rug (or bare floor, if your flooring itself changes materials) under the bed tells your eye “this is a different zone” with zero physical barrier required.
Lighting creates zones through pools of light rather than one flat overhead wash. A single ceiling fixture lighting the whole room reads as one undivided space, no matter how the furniture is arranged. Add a floor lamp by the sofa, a table lamp on the nightstand, and under-cabinet lighting in the kitchenette, and you’ve created three distinct light pools that your eye reads as three distinct rooms, even in complete darkness outside those pools.
Furniture placement is the most flexible zoning tool because it requires no purchase beyond what you likely already own. A bookshelf, dresser, or credenza positioned perpendicular to a wall, rather than flush against it, becomes a soft divider between two zones. It doesn’t block light the way a full partition would, and it doesn’t require any landlord approval, since nothing is attached to the walls or floor.
Used together, these three tools can divide a totally open studio into four legible zones without a single nail, and every one of them comes with you when you move out.
Zone One: The Sleep Zone
Your sleep zone should sit as far from the entry sightline as your layout allows, ideally in a corner, alcove, or nook if your studio has one. The goal is simple: whoever walks through your front door shouldn’t see your bed as the first thing in the room. That single sightline decision does more to make a studio feel like a real apartment (instead of one giant bedroom) than almost any other choice you’ll make.
If your studio has an architectural anchor, a stepped ceiling, a recessed nook, an oddly angled wall, use it for the bed even if it isn’t the “obvious” spot. These irregular corners are usually the hardest to furnish with anything else, which makes them ideal for a bed frame that just needs to fit cleanly against two walls.
Define the sleep zone with:
- A rug distinct from your living area rug, in either color or texture, placed under and slightly past the foot of the bed
- A single table lamp instead of overhead lighting for anything you do in this zone after dark
- A tall, narrow bookshelf or open shelving unit, positioned perpendicular to the wall behind the headboard, acting as a soft visual break between sleep and whatever zone sits next to it
If your studio is under 350 square feet and a full divider piece feels like too much, even a floor-length curtain on a tension rod can create the same effect. It won’t block sound, but it will interrupt the direct sightline, which is the part actually doing the zoning work.
Zone Two: The Living Zone
Your living zone deserves your best natural light, since it’s where you’ll spend your most awake, active hours. If your studio has one dominant window, build the living zone around it rather than defaulting to whatever corner is left over after the bed goes in.
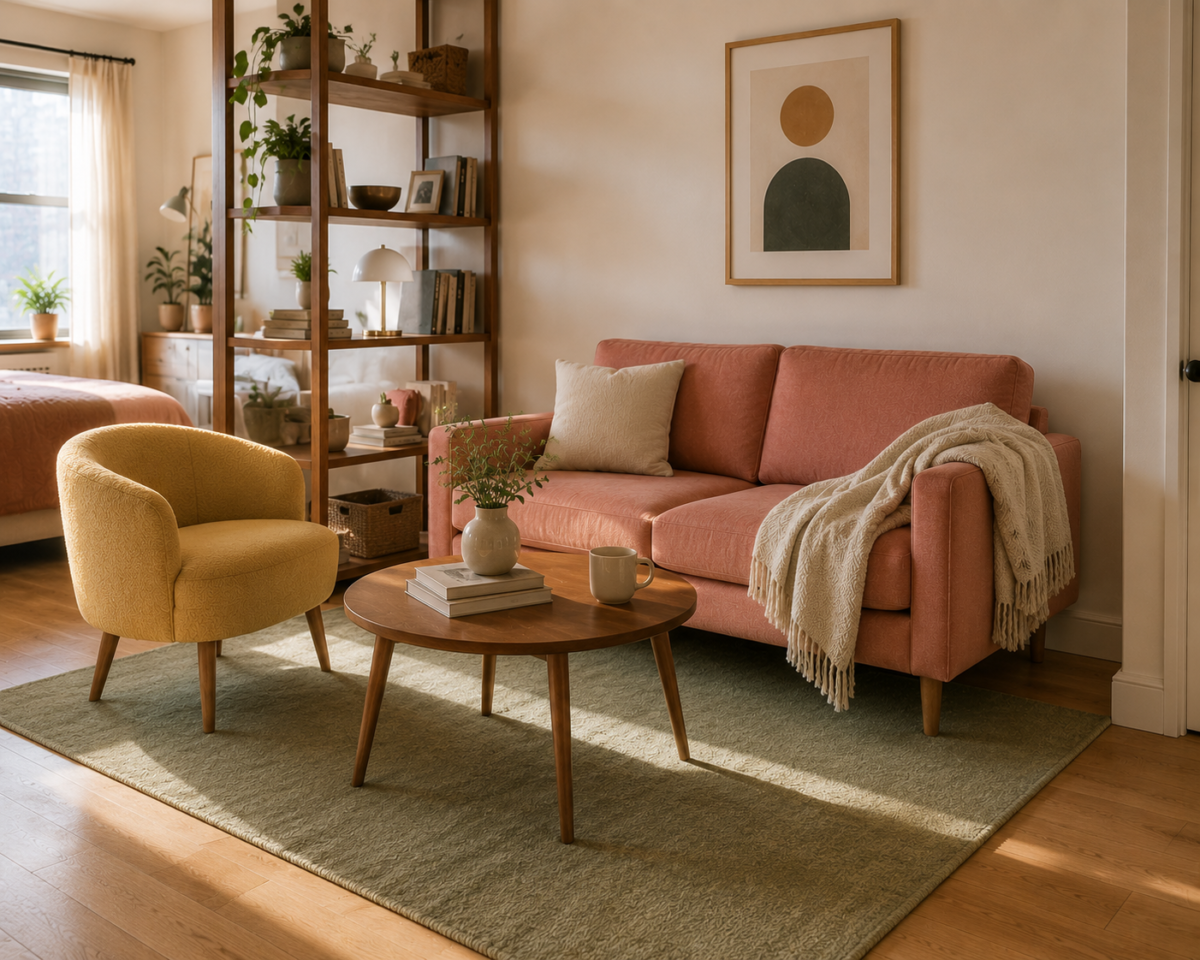
Anchor this zone with a rug sized generously enough that every piece of seating sits fully on it, not just the front legs balanced at the edge. An undersized rug is one of the most common studio mistakes, since a rug that only partially reaches under the furniture reads as an accident rather than an intentional boundary.
Layer in a floor lamp positioned near the sofa rather than relying on the room’s main overhead light. This does double duty: it creates the light pool that signals “living zone” after dark, and it means you’re never lighting your entire studio just to watch TV or read on the couch in the evening.
If your living zone backs up against your sleep zone, this is the natural spot for the perpendicular bookshelf divider mentioned above. It serves both zones at once, storage and display facing the living area, a soft visual break facing the bed.
Zone Three: The Kitchen Zone
Kitchenette zones in studios rarely need dedicated zoning tools, since appliances and cabinetry usually already mark the boundary. The zoning work here is less about defining the edge and more about keeping that edge visually contained, so an inherently busy zone (dishes, small appliances, food storage) doesn’t visually bleed into your living or sleep zones.
A few specific moves keep a kitchenette zone contained:
- Open shelving with matching containers rather than a mix of visible boxes, bags, and mismatched jars. Visual consistency reads as organized even when the actual contents are ordinary pantry items.
- A rug or floor mat with a distinct texture or color at the kitchen’s edge, especially if your kitchenette shares an open wall with your living area, so the transition between zones reads as intentional rather than accidental.
- Under-cabinet lighting if your kitchenette has any wall cabinets at all. This adds a fourth light pool to the room and makes the cooking zone feel finished rather than like an afterthought squeezed against one wall.
If your kitchen appliances and cabinetry run along the same wall as your entry, this naturally becomes the first thing visible when someone walks in, which is worth keeping in mind when deciding where your busiest visual clutter (mail, dish racks, small appliances) actually lives day to day.
Zone Four: The Work Zone
Not every studio needs a dedicated work zone, but if you work from home even occasionally, it deserves real planning rather than a laptop balanced on the coffee table. A dedicated work zone, even a small one, changes how your brain separates “on” time from “off” time in a space where every other zone is visible from every other zone.
The most space-efficient version of this zone is a slim desk (24 to 30 inches wide) tucked against an underused wall, ideally near a window for natural light during work hours. If floor space is genuinely too tight for a standalone desk, a small round table doing double duty as both a dining spot and a desk works better than skipping a work zone entirely.
Define it with:
- A compact desk lamp, adding a fifth light pool if your studio has room for one
- A rug remnant or small accent rug under just the desk and chair, even a 2-by-3-foot piece, to visually anchor the zone without competing with your living area rug
- A chair that tucks fully under the desk when not in use, so the zone visually disappears outside of work hours instead of permanently occupying floor space
This zone benefits the most from being genuinely temporary in feel. Unlike your bed or sofa, a desk and chair that can tuck away cleanly help the room shift from “workday” to “evening” without a full rearrangement.
Combining Zones When Your Studio Is Genuinely Tiny
In a studio under 300 square feet, trying to fit four fully separate zones can backfire, since each individual zone shrinks to the point where none of them feel functional. In these tighter layouts, combine zones deliberately rather than forcing all four to exist independently.
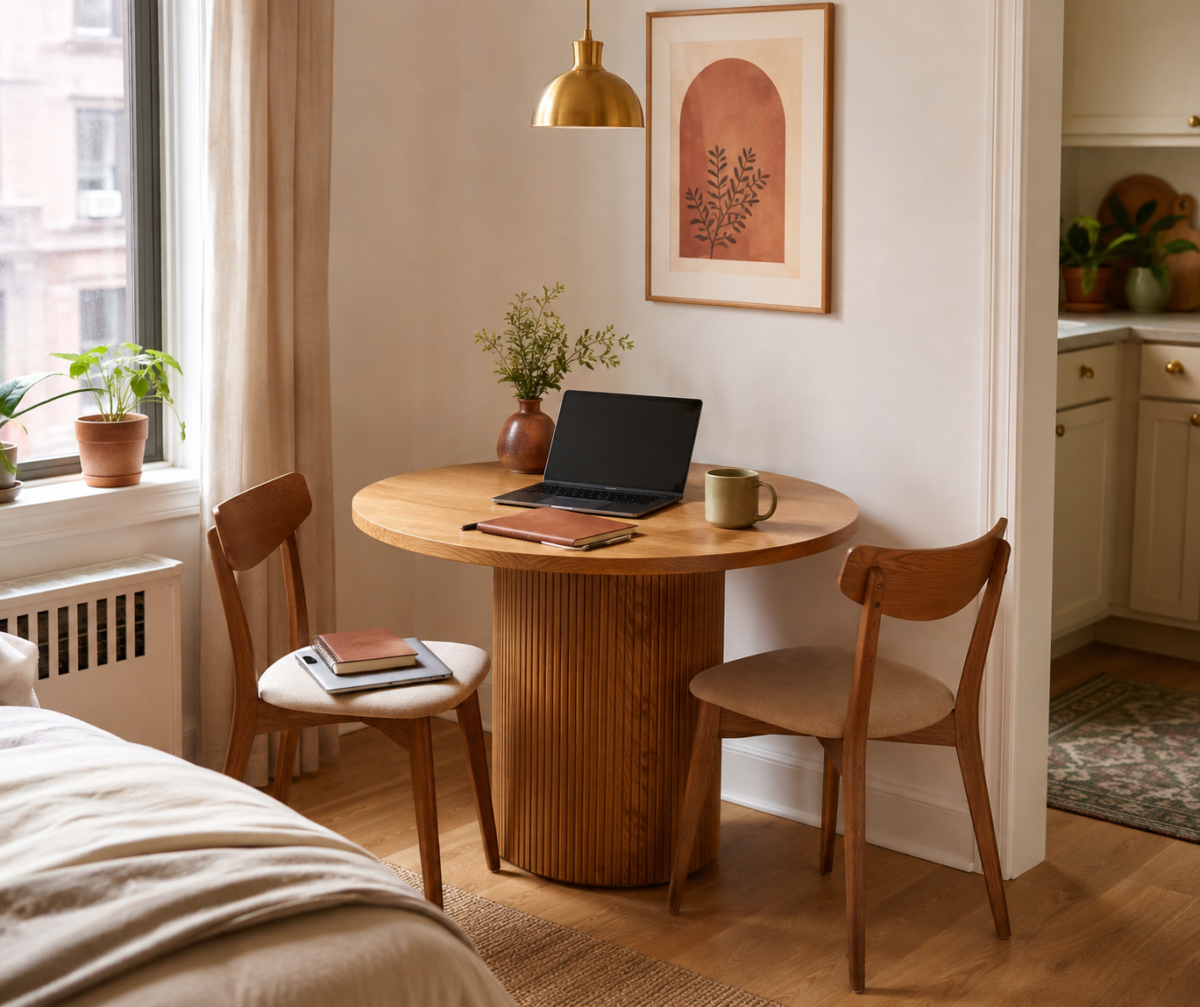
The most natural combination is dining and work, since both need roughly the same footprint: a small table and one or two chairs. A round table near your best window can hold your laptop on weekday mornings and dinner plates that evening, without needing two separate furniture zones competing for the same limited square footage.
The second most natural combination is sleep and work, particularly in a studio with a platform bed that includes built-in storage or a raised frame. A slim desk tucked at the foot of the bed, perpendicular to the wall, can share the sleep zone’s rug and lighting without visually merging into the living area.
What doesn’t combine well: living and sleep. Keeping these two zones distinct, even in a very small studio, matters more than any other zoning decision, since it’s the boundary that determines whether the apartment feels like a real living space or one continuous bedroom.
Frequently Asked Questions
Can you really zone a studio apartment without any walls or dividers? Yes. Rugs, layered lighting, and furniture placed perpendicular to walls (rather than flush against them) can define distinct zones just as effectively as a physical divider, and all three tools are fully removable, which matters in a rental.
What’s the fastest way to zone a studio apartment on a tight budget? Start with rugs. A different rug under your bed than under your living area seating is the single cheapest, fastest zoning move available, and it requires no tools, no drilling, and no landlord approval.
Should the bed or the sofa go near the window in a studio? Give your living zone the best natural light whenever possible, since it’s where you’ll spend the most active, awake hours. Reserve dimmer corners or nooks for the sleep zone, where less daylight matters far less.
How many rugs do I need to zone a studio apartment? Most studios need two to four, depending on how many zones you’re defining. A living zone rug and a sleep zone rug are the essential minimum; a small accent rug under a work zone or kitchen edge is a helpful addition if your layout supports it.
What if my studio doesn’t have a nook or alcove for the bed? Use furniture placement instead. A tall, narrow bookshelf positioned perpendicular to a wall, with the bed tucked behind it, creates a soft architectural break even in a fully open rectangular room with no built-in features to work with.
Related Reading
- The Complete Guide to Studio Apartment Living — the full system this zoning method fits into, covering furniture scale and visual tricks alongside zoning.
- Furniture Scale That Actually Works in One Room — exact sizing guidance for the furniture that goes inside each zone mapped out here.
- Making a Studio Feel Bigger Than It Is — mirror placement and color strategy that reinforce these zones visually.
- Closet Organization — storage systems that keep each zone from spilling into the next, from the Organization & Storage hub.
- Parent Category: Studio Apartments
- Parent Hub: Apartments & Rentals